
Are drain Chains Safe for Pipes With Channel Rot?
While we suggest using a Picote Smart Spider in drains with channel rot, we do understand that our customers might not have one on hand.
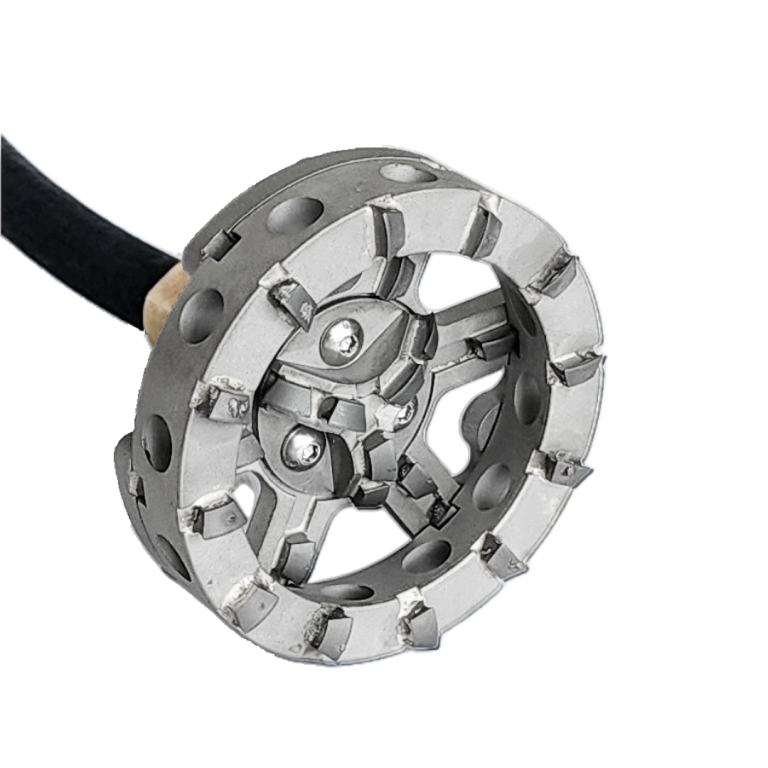
Dealing with stubborn root blockages in drains becomes much easier with a root cutting tool attached to a flex shaft. While our drain root cutters come pre-assembled, knowing how to assemble or reassemble one after maintenance can save you time and hassle on the job.
This guide explains the assembly process, how the root cutter works, and provides some expert tips for smooth operation.
A root cutter is designed to remove roots and other tough obstructions inside pipes.
Key features:
A root cutter consists of a few essential parts:
You can use just the base plate for light tasks or add the top blade for a full root-cutting setup.
Assembling a drain root cutter for a flex shaft is simple once you know the steps. With proper assembly, your cutter will be a reliable and powerful tool to handle tough root blockages and restore smooth flow in drains.
Whether you’re assembling it for the first time or reassembling after maintenance, following these instructions ensures the cutter stays secure, safe, and effective.
For a visual walkthrough, check out our video guide.
While we suggest using a Picote Smart Spider in drains with channel rot, we do understand that our customers might not have one on hand.
After drain descaling it is tempting to stop as soon as the camera shows a cleaner pipe wall. However, the scale, rust, grease and other
Hydro jetters and flexible shaft machines are both powerful tools for professional drain cleaning, but they work in very different ways. A jetting machine uses
Introduction When working with professional drain cleaning equipment, transporting and handling flexible shafts can quickly become a challenge, especially when dealing with longer, heavier cables.
 Български
 Hrvatski
 Čeština
 Dansk
 Nederlands
 English
 Eesti
 Français
 Deutsch
 Ελληνικά
 Magyar
 Italiano
 Lietuvių kalba
 Polski
 Português
 Română
 Slovenčina
 Slovenščina
 Español
 Svenska